My first attempt at building a Kontakt instrument... Whilst sitting in the Alps with a broken leg, I decided to make my first Kontakt instrument. I had an SM57, a camera tripod, and a tenor recorder I had pinched from the attic of my parents house several months before.
Planning
Probably the easiest part of the project to neglect, but so critical. As my first instrument, I decided to be quite unambitious with the size of the sample set, just recording two velocities, and only long notes. It is important to use the planning stage to be specific about what it is that's going to be made. This is largely to help build a useful template, and save time down the line. I outlined the notes I wanted (D, E, F#, G, A, B, C#, D), and created regions in a Reaper file to record each of these notes six times. Three quiets, and three louds. The reason for doing three of each is to provide some variation in the notes utilising a feature in Kontakt called 'round robins', whereby you can tell the sampler to alternate between playing any of the allowed notes, rather than just one note over and over.
Sampling
With the SM57 tied to the tripod, utilising the metronome in Reaper, along with the template I set up, I carefully and precisely butchered the recording, realised my template was bad, and set to work re-writing the entire thing. The regions needed to be longer, the gaps needed to be longer (breathing was difficult), I needed to give myself audible prompts as to which note at which velocity was required. Changes made, I set up for round two, played some notes and had my set of (extremely unpleasant) samples. I re-did a few bum notes, used a Reaper function to line up the transients to the start of my regions, and exported the tracks using the Region Manager to export each region separately. Now, as I discovered to my own cost, naming convention here is really importatnt. Ideally, save each file with the instrument name, the MIDI note name, the lower and upper bound (I'll get to that in a moment)the velocity range and the group name. This significantly speeds up importing into Kontakt. The lower and upper bounds are the notes that you are happy for Kontakt to adjust your original sample to in order to fill in gaps where you have no samples. My recorder was in D, and producing some of the accidentals was out of my severely lacking skillset, so I let Kontakt take care of those notes by giving my notes lower and upper bounds.
recorder_E4_D#_F#_0_64_1.wav In order, this is the instrument, the MIDI notes, the lower bound, the upper bound, the lower velocity bound, the upper velocity bound, and the group to which this note will belong.
Kontakt
Now I could import all my samples into Kontakt. The naming convention means I can use the auto-map feature to automatically map all of the samples to the correct positions on the keyboard. We want to create multiple groups (one for each round robin), then make sure you set the auto-map function to assign the samples to their corresponding groups. At this point, you have a totally working, legit Kontakt instrument.
Cleaning Up
UI
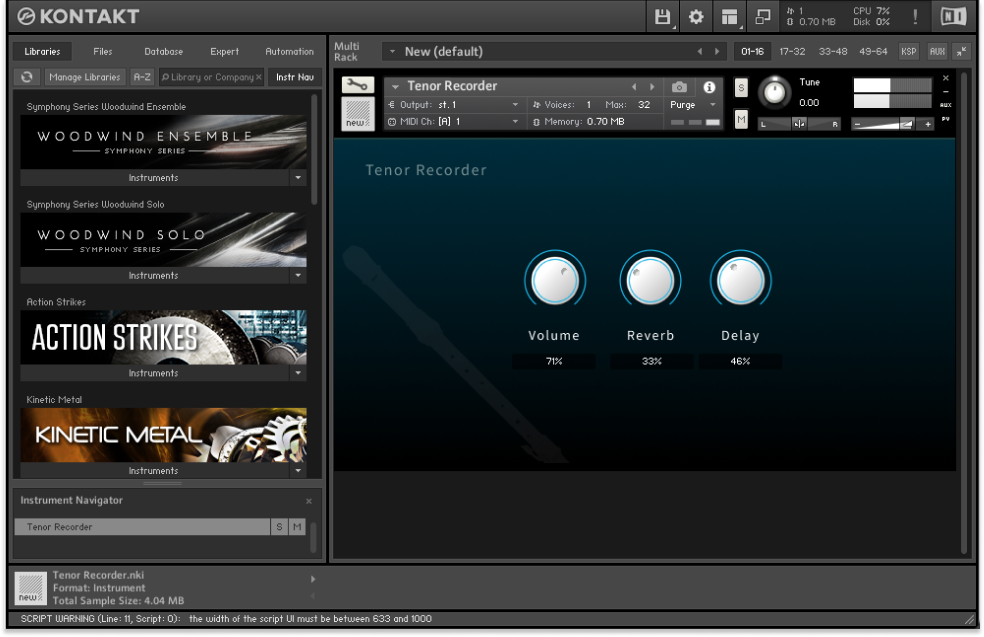
The first job is to provide a UI with some controls for the user to adjust the sound. I wanted a volume control, a reverb control and a delay control. Because if your samples are poor, just drench them in delay and reverb and you'll get something cool. I could use the default Kontakt UI tools, however, I wanted to make a custom UI. To do this, we have to create the resources folder for the assets we create, so Kontakt knows to import them. To do this, go to the 'Instrument Options', and click 'create resources folder'. Give it the same name as your project, and it will create the necessary files
Reverb
Adding reverb is laughably trivial, simply add a new send effect and choose a reverb, and there is a plethora of juicy options. These can be tweaked afterwards.
Looping
For some instruments, long notes are essential. If you record a five second sample, there needs to be a way to allow the user to elongate that sample somehow to mimic a player sustaining a note for ten seconds. There is a looping feature within Kontakt that allows a portion of the sample to be chosen for a loop. Holding the note will then cycle that loop continuously. This can still be jarring, and one easy way to reduce the click is to add a crossfade.
Legato
Finally, to make the transitions between notes less janky, Kontakt allows you to create something that vaguely resembles a legato. I'm curious to try and find out how the real legato libraries are created. Do they record sampels of the transitions as well as the held notes, and then transition from the held not sample immediately into the transition sample, before swapping again to the held sample. Perhaps this is something I can experiment with at home with the recorder, or the violin/cello.
I have found a course to learn 'true legato' scripting. I guess this means there's a decent amount to it, but maybe first I should try and do some more research to see if there are any good free tutorials.